
A rough (scratch) coat of earthen plaster was applied to the inside of the dome in preparation for a final lime wash that will follow (see below for photo of a section of the work). Once completed the scaffolding can be removed from the inside of the 'dome room' and I can move to the next task in the construction of the studio.

CLICK ON ANY PHOTO TO ENLARGE
I have a book on earthen plasters but never got to reading it. My considerations for the rough-coat was that it had to be thinly applied so not to flake-off and that the materials could be sourced from the property (no cost solution).
The photo below shows the three ingredients I chose. From left: Sifted sand from my dry wash; Calcium Carbonate (CaCO3) which is a byproduct from my cutting calcite as part of a stone business I have ( www.stoneproducts.biz ); and sifted clay soil that i have been using all-along to mix the 'cob' for the building itself. Think of both the calcium carbonate and clay as the binder and the sand as the aggregate to both add texture, strength and resist cracking.

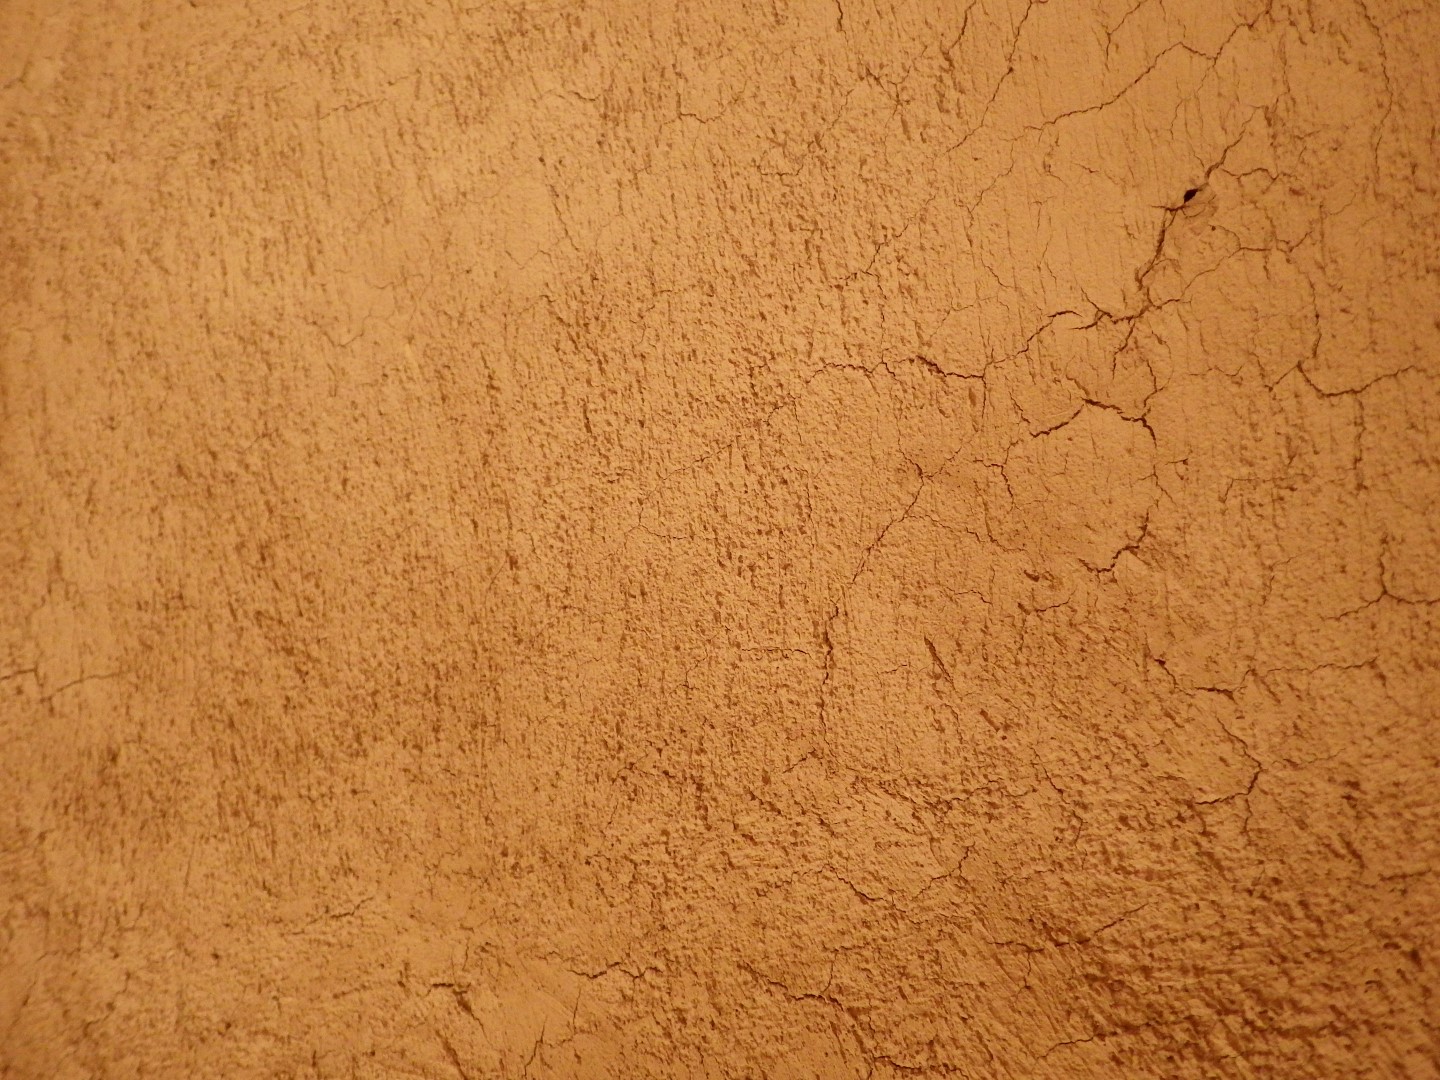
For the mix I used one part clay, one part calcium carbonate and two parts sand. The mix was not tested beforehand, therefore in hindsight I observed that should have used much more sand; at least four parts (instead of two) to prevent cracking that you can see in the close-up photo below the video. Water was added to create an earthen slurry.
The video below shows the consistency of the mix. I wanted a wet mix to better absorb and thus adhere to the inside of the clay dome. But I did not want the mix to be overly 'runny' because I was using a gloved-hand to apply to the existing cob ceiling, instead of a trowel.
I prepared small sections of the ceiling to work on at a time. I would wet-down small 2'x2' sections since the cob wall that is mostly clay would absorb the water quickly. Actually, I would keep wetting the wall (with a misting nozzle) until it was super-saturated, then hand-rub-in the earthen mix as a thin layer to create a good bond. See short video showing me applying the render inside the dome.
The photo below shows the rough coat after application and drying. There are many cracks due to insufficient sand, but since I'm going to apply a finish coat (lime wash), hopefully most of the cracking will not be noticed. Actually, I want more of a rough-textured dome ceiling and the cracks are part of that look.
I was curious to see what the dried rough coat would look like with the addition of the Calcium Carbonate. Since the Calcium Carbonate is rock dust and is not 'fired' like slacked-lime like you buy at the hardware store, I was not expecting be benefit of the absorption of carbon dioxide (CO2), which would happen with slaked-lime. In that case the absorption of carbon dioxide from the air back into the lime after application, would essentially turn the slaked-lime back into limestone.
In my case, the un-slaked Calcium Carbonate byproduct from my stone business, acted more like clay - binding to it - and creating a good bond. So in general, I'm happy with the rough coat.
CLICK ON ANY PHOTO TO ENLARGE
Below is a bonus photo showing the scaffolding 2-sets, that helped create the platform which to work in the dome's ceiling. Notice in the foreground the 3-foot thick rock stem wall which supports the thick cob-walls of the interior passage. Also at the top of this photo is shown the 8-inch diameter Mesquite wood beams that support the roof and dome above.

No comments:
Post a Comment